
 EU Stock
 Poland Stock
 Ukraine Stock
  USA Stock
 AU Stock


CONFIG - WIFI
By Kelly posted 2024-07-17 12:03:57WIFI Module Configuration
Here we use Protoss PW11 / Protoss PW10 as an example.
1. After Protoss PW11 / Protoss PW10 is power on, use phone or notebook to find WIFI hotspot with name 'PW10', and connect it. Then click info icon to go to WIFI infomation page.
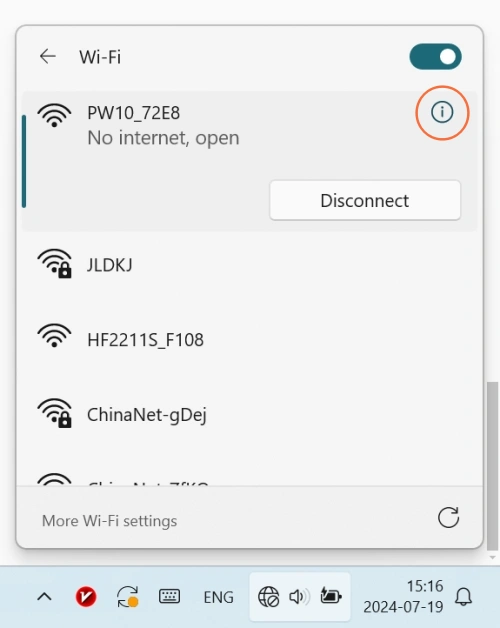
2. In the WIFI infomation page, find IPv4 default gateway.
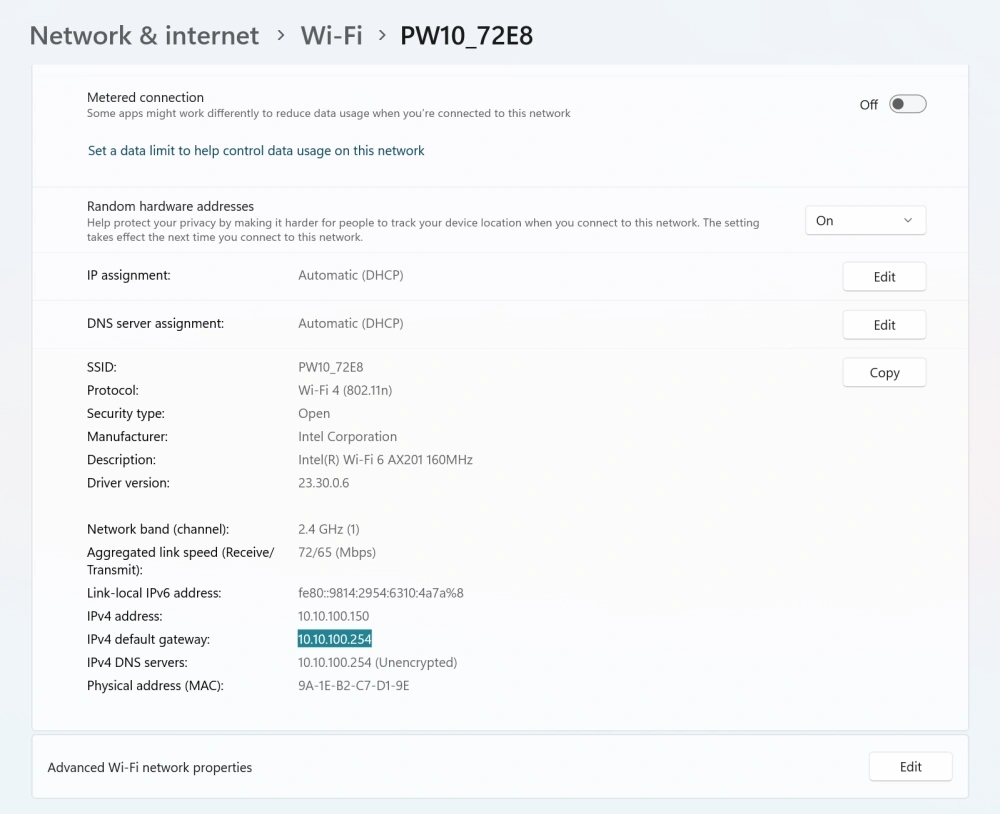
3. In the browser, input IP address of IPv4 default gateway to go to configuration page. You can change display language at top right if needed. Both User name and Password is admin.
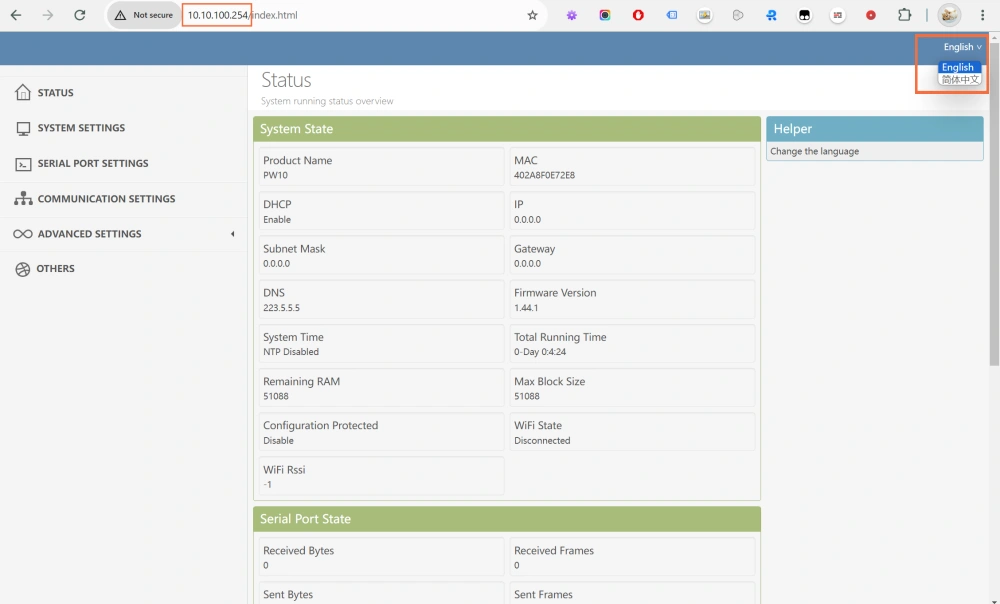
4. Click SYSTEM SETTINGS at left pannel, go to System Settings page.
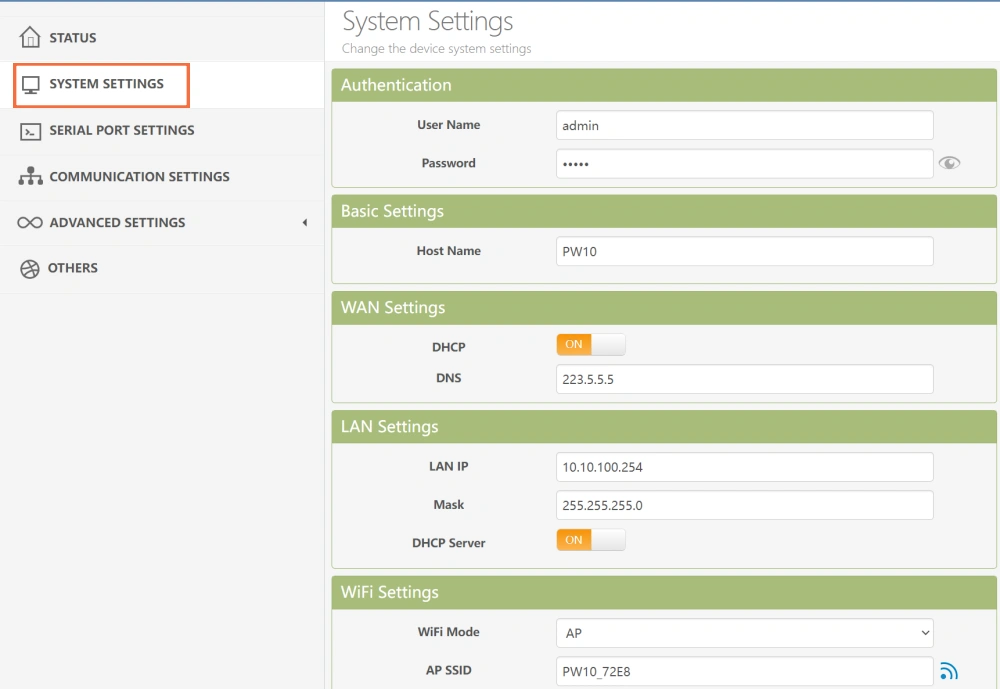
If your WIFI Module has Multi-Host Option, turn it off.
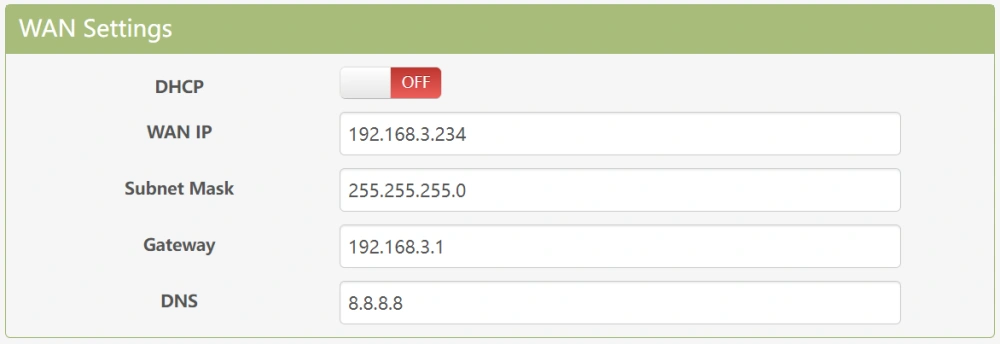
5. In System Settings page, WAN Settings part:
DHCP: OFF
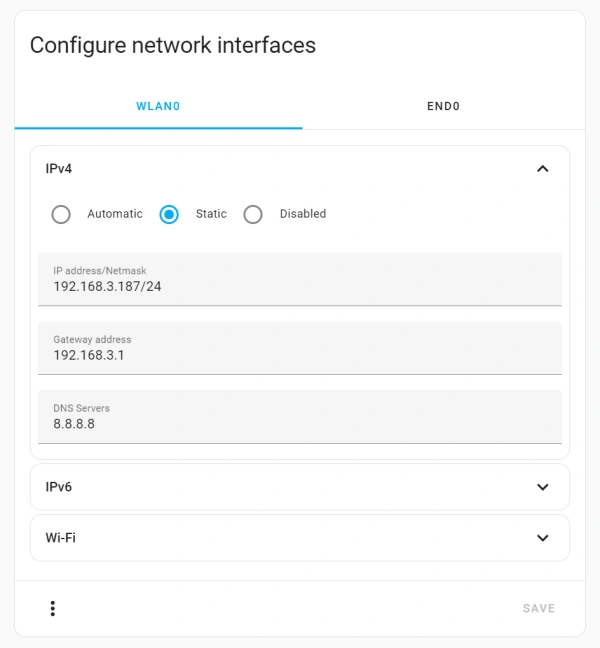
WAN IP: In Home Assistant -> Settings -> System -> Network -> Configure network interfaces -> WLAN0 -> IPv4, find Gateway address of Raspberry Pi. As shown in the example image, the Gateway address is 192.168.3.1. Choose an IP Address from the range 192.168.3.2 to 192.168.3.255, but make sure it's not already in use by another device. If the chosen address is occupied, select a different one.
Subnet Mask: 255.255.255.0
Gateway: Same Gateway address as Home Assistant WLAN0
DNS: 8.8.8.8
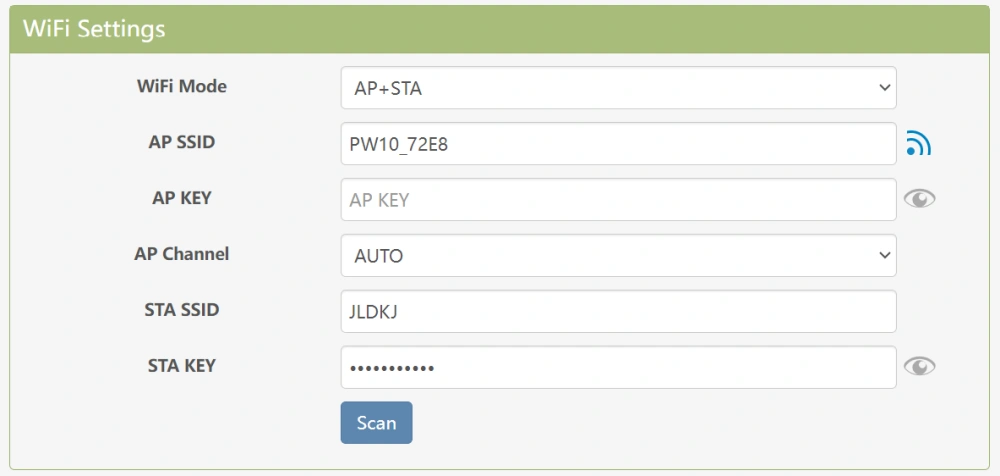
6. In System Settings page, WiFi Settings part:
WiFi Mode: AP+STA
STA SSID: Click 'Scan' button to find your WIFI hostspot and choose it
STA KEY: Password of your WIFI hotspot
Then click 'Submit' button at the bottom of the page to save settings.
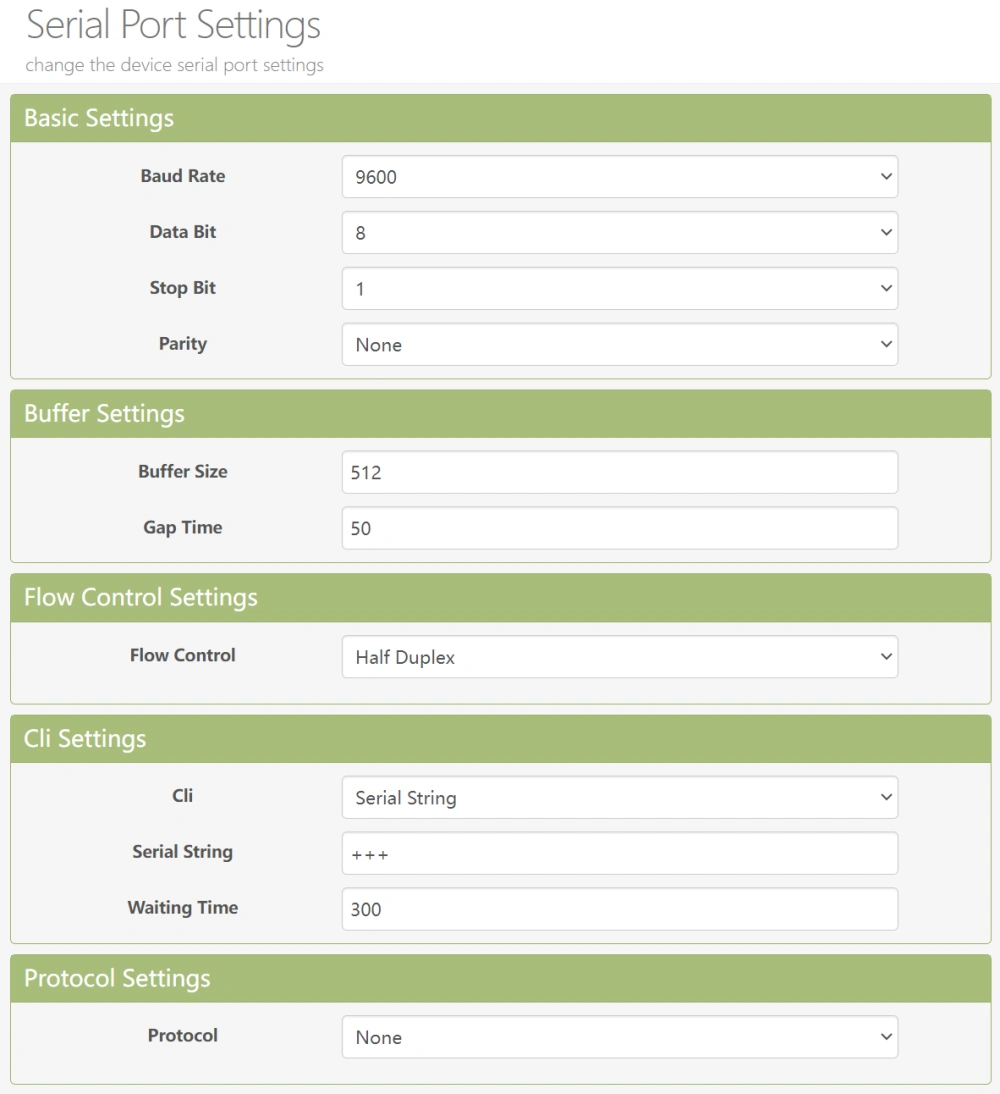
7. In Serial Port Settings page:
Baud Rate: Usually it is 9600, but latest GP-PC200 BMS uses 115200 (RS232)
Data Bit: 8
Stop Bit: 1
Parity: None
Flow Control: Half Duplex
Ptotocol: None
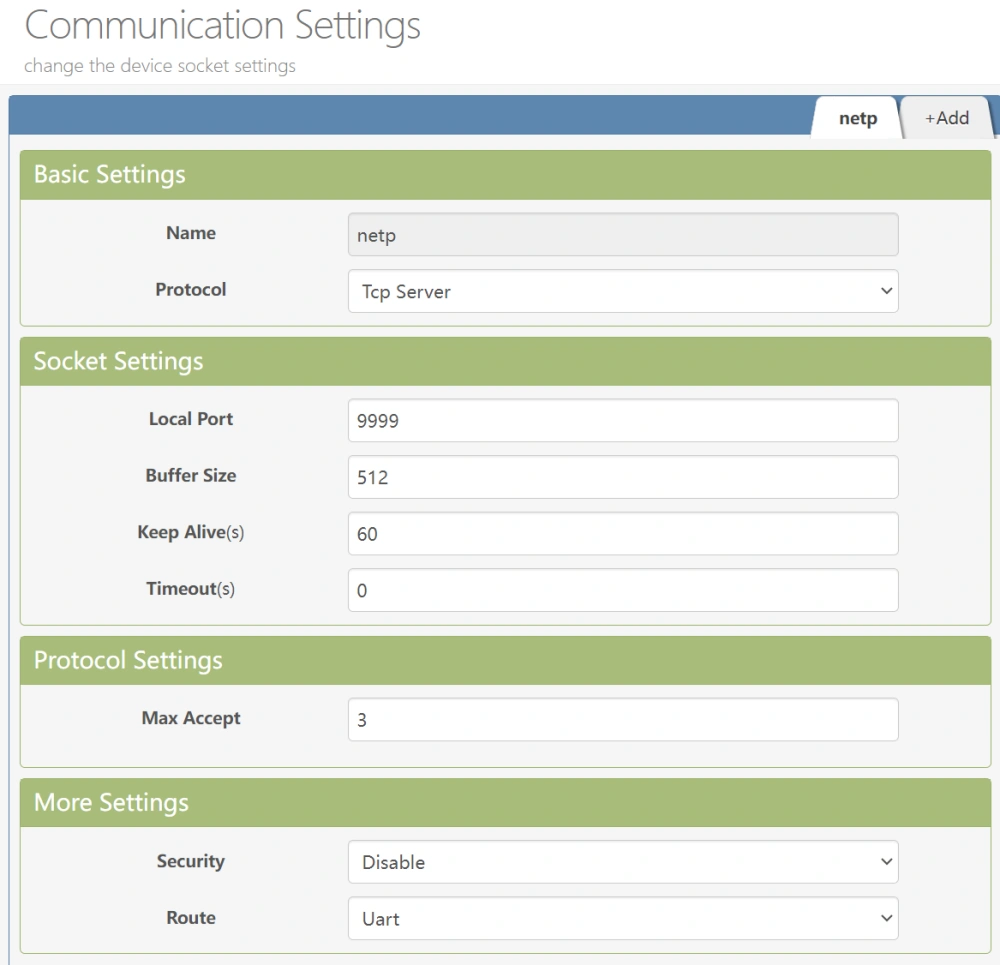
8. In Communication Settings page:
Protocol: Tcp Server
Local Port: Leave the Port as default or assign a different Port of your choice, here we use Port 9999
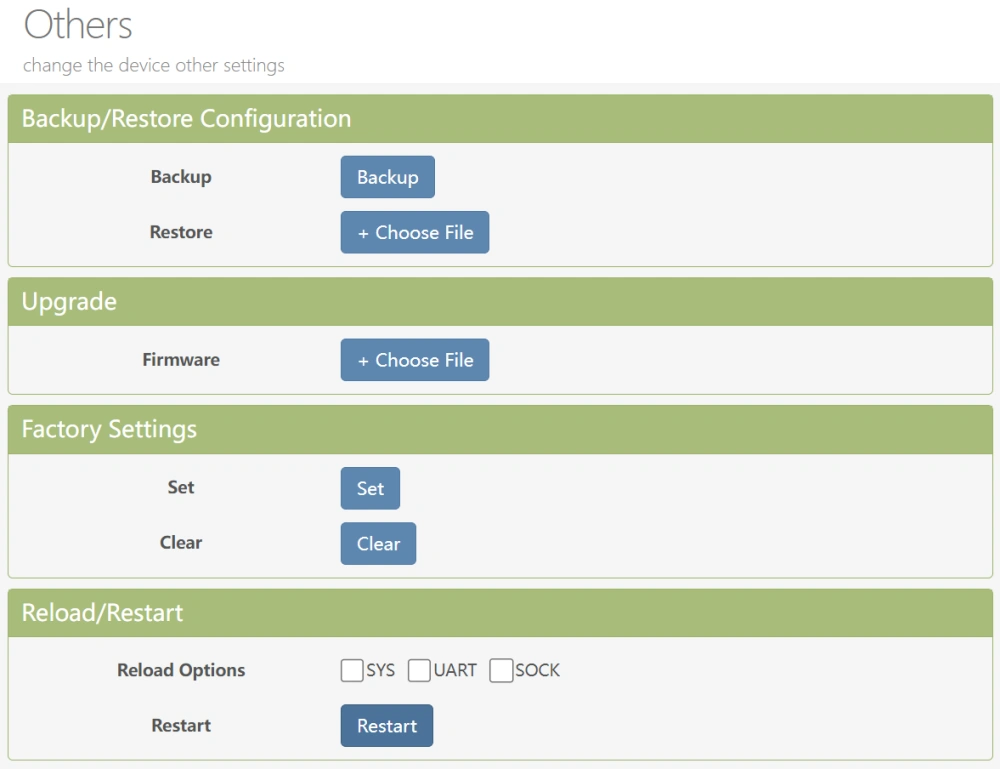
9. In Others page, click 'Restart' button to make settings take affect.
Addon Configuration
Configuration example (Note: Green parts are used):
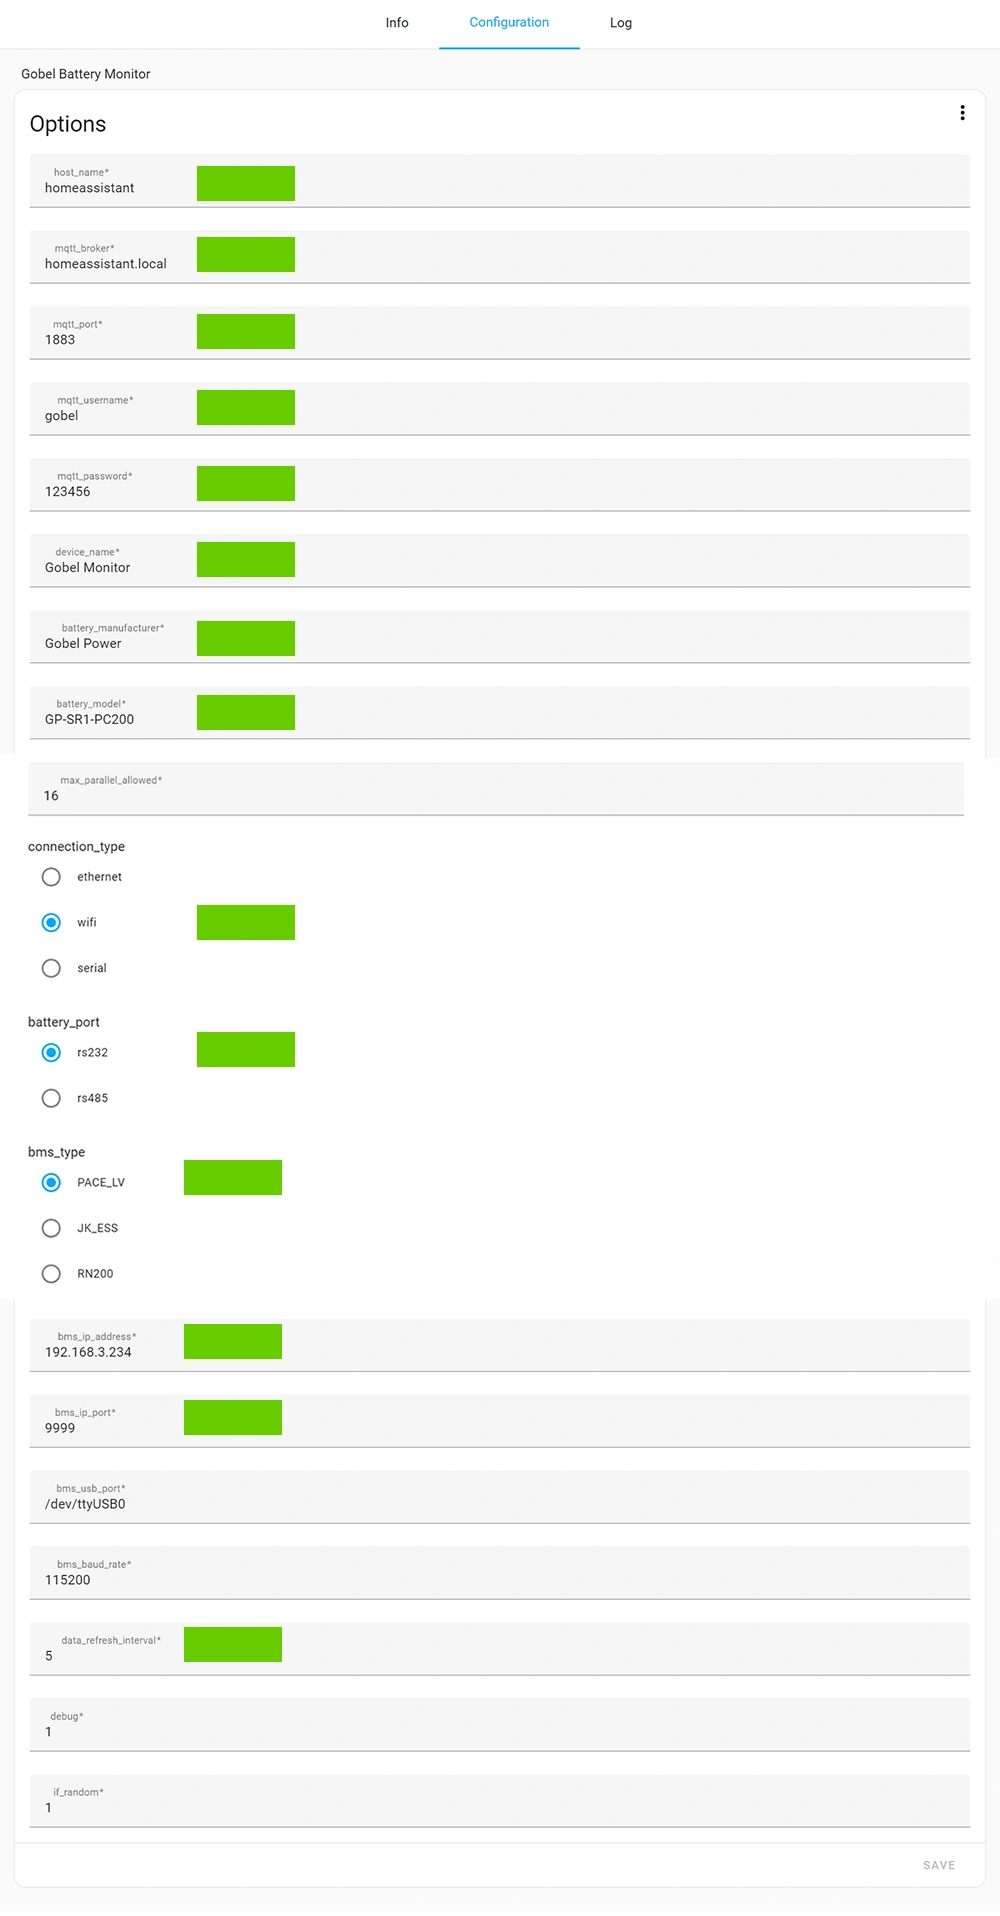
host_name: you can find it in Home Assistant -> Settings -> System -> Network -> Host Name
mqtt_broker: Broker field in Setup - MQTT step
mqtt_port: Port field in Setup - MQTT step
mqtt_username: Username field in Setup - MQTT step
mqtt_password: Password field in Setup - MQTT step
device_name: A unique name for each device, it will be used for sensor name
battery_manufacturer: Battery manufacturer name, any string is accepted
battery_model: Battery model name, any string is accepted
connection_type: wifi
battery_port: rs232 or rs485 according to what port used
bms_type: BMS used
bms_ip_address: WAN IP of WIFI Module Configuration Step 5 in this page
bms_ip_port: Local Port of WIFI Module Configuration Step 8 in this page
data_refresh_interval: unit is seconds