
 EU Stock
 Poland Stock
 Ukraine Stock
  USA Stock
 AU Stock


CONFIG - ETHERNET OPTION 1
By Kelly posted 2024-07-19 12:20:26Ethernet Module Configuration
Here we use Waveshare RS232 to Eth (B) / Waveshare RS485 to Eth (B) as an example.
1. Connect the Waveshare device to your Raspberry Pi using an Ethernet cable.
2. After Waveshare is power on, open software VirCOM in the PC and allow firewall while open the software.
VirCOM Software Download Link: VirCOM
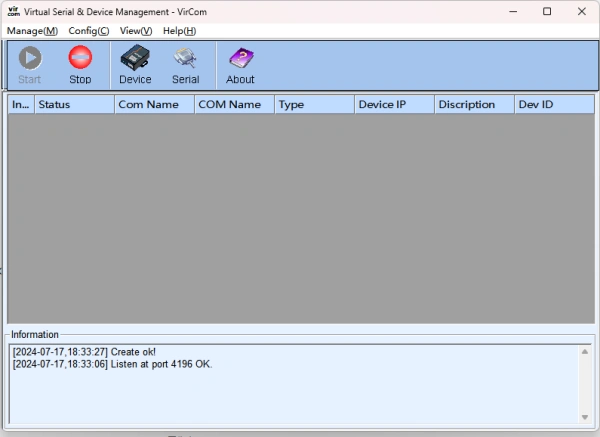
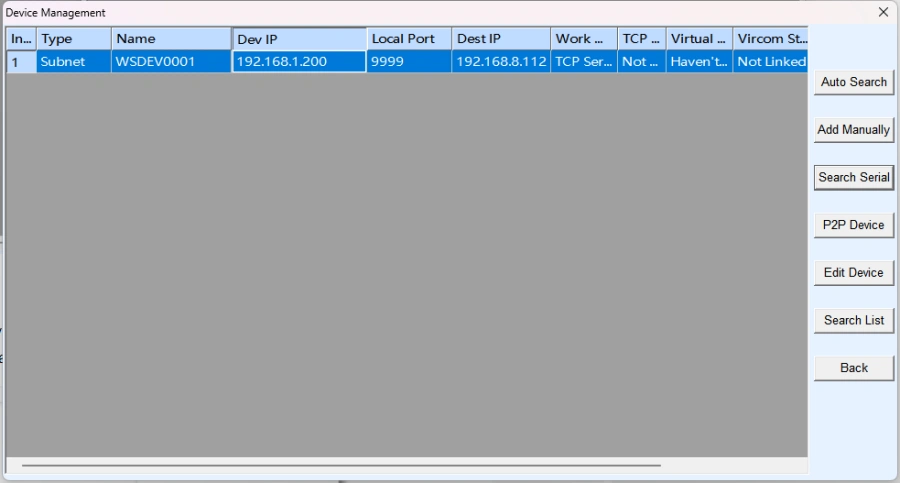
3. The software will automatically detect the module. If it doesn't, click 'Device' and then 'Auto Search' to search for the module.
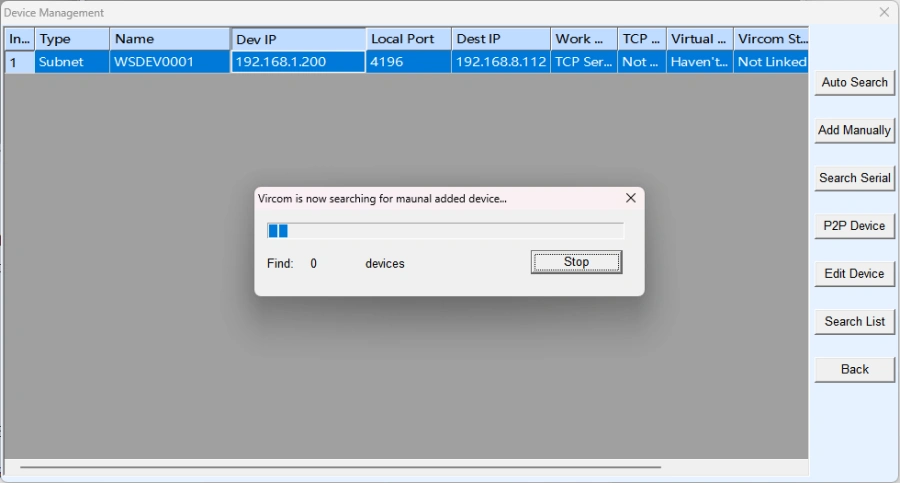
4. If the module is found, double click the blue list and go to configruation page. Modify settings in orange box. Then click 'Restart Dev' to save settings.
IP Mode: Static
IP Address: Leave the IP Adress as default or assign a different IP Adress of your choice, here we use default IP Address 192.168.1.200
Port: Leave the Port as default or assign a different Port of your choice, here we use Port 9999
Work Mode: TCP Server
Net Mask: 255.255.255.0
Gateway: If the IP Adress is 192.168.1.200, Gateway is 192.168.1.1
Baud Rate: Usually it is 9600, but latest GP-PC200 BMS uses 115200 (RS232)
Data Bits: 8
Parity: None
Stop Bits: 1
Flow Control: None
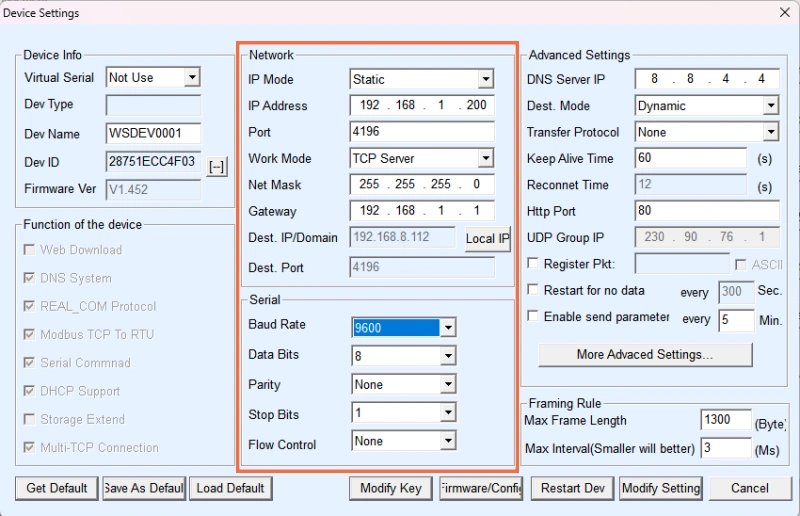
5. Wait for a while, you will see new settings take affect.
If your Ethernet Module has Multi-Host Option, turn it off.
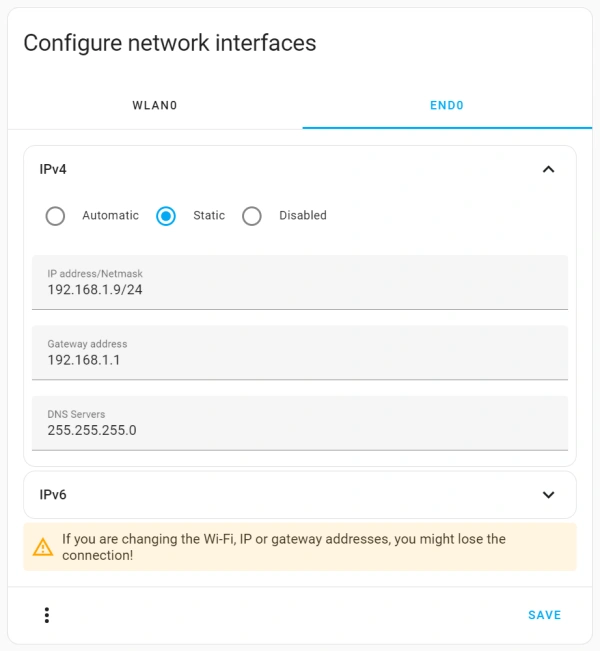
6. In Home Assistant -> Settings -> System -> Network -> Configure network interfaces -> END0 -> IPv4, add an Static IP Address.
IP address/Netmask: In Step 4, the IP address was set to 192.168.1.200. Here, choose a different IP address but within same range, such as 192.168.1.9, and set the Netmask to 24
Gateway address: Same as Gateway in Step 4
DNS Servers: Same as Net Mask in Step 4
Addon Configuration
Configuration example (Note: Green parts are used):
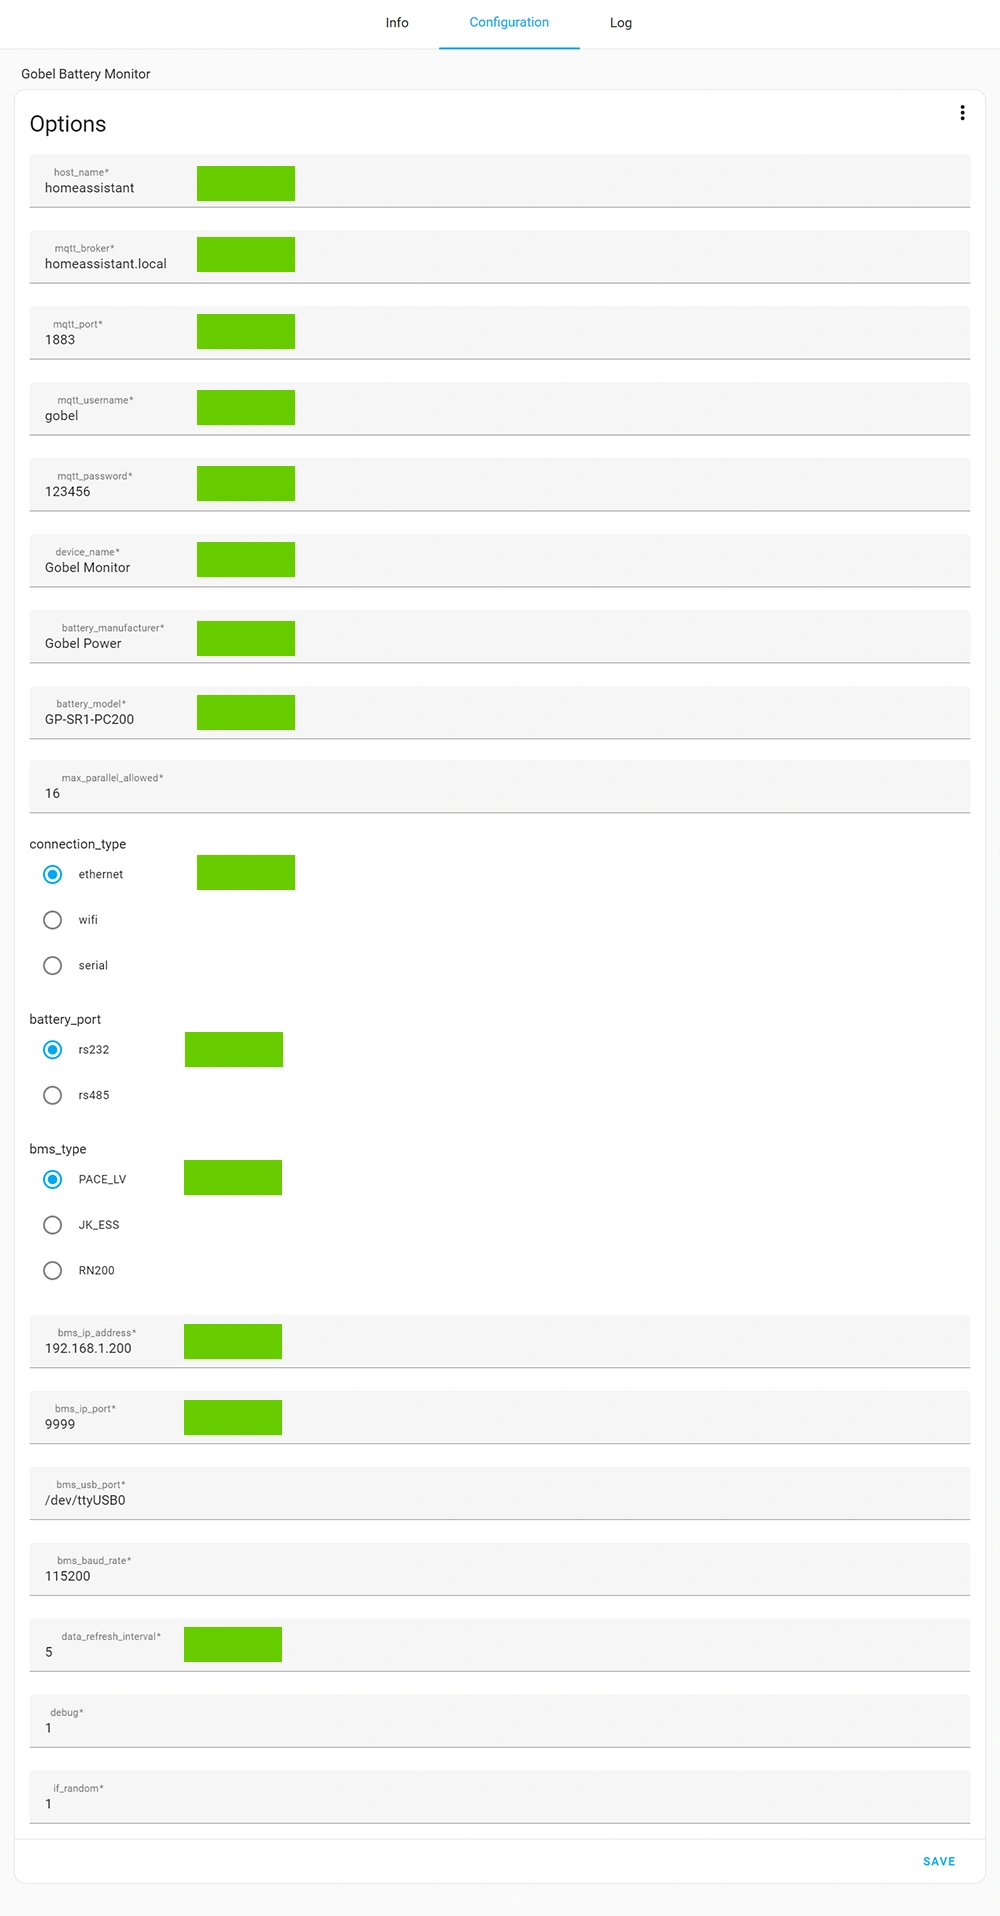
host_name: you can find it in Home Assistant -> Settings -> System -> Network -> Host Name
mqtt_broker: Broker field in Setup - MQTT step
mqtt_port: Port field in Setup - MQTT step
mqtt_username: Username field in Setup - MQTT step
mqtt_password: Password field in Setup - MQTT step
device_name: A unique name for each device, it will be used for sensor name
battery_manufacturer: Battery manufacturer name, any string is accepted
battery_model: Battery model name, any string is accepted
connection_type: ethernet
battery_port: rs232 or rs485 according to what port used
bms_type: BMS used
bms_ip_address: IP Address of Ethernet Module Configuration Step 4 in this page
bms_ip_port: Port of Ethernet Module Configuration Step 4 in this page
data_refresh_interval: unit is seconds